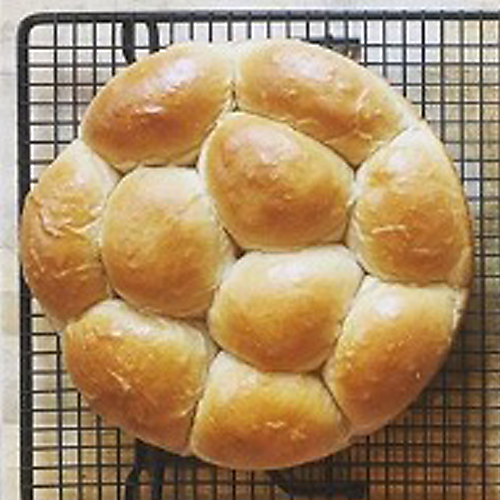

Fluffy Stone-Milled Dinner Rolls

These rolls from Abby Love of Abby Jane Bakeshop will have the family fighting over the extras at Thanksgiving, so you'd just as well double the recipe if you want to keep the peace. Abby generously provides the measurements in both cups and grams, but we all agree that weighing is the way to go. It's a good habit to get into and will provide more consistent results. If you don't yet have a kitchen scale, we recommend this one.
Makes 24 rolls
To load a printable PDF of this recipe, click here.
¾ cup (190g) hot water
1½ cups (340g) whole milk
5½ cups (710g) Barton Springs Mill AP flour or premium AP, plus extra for hand kneading if necessary
1 tablespoon (10g) instant or rapid-rise yeast (sometimes labeled bread yeast)
3 tablespoons (40g) granulated sugar
2½ teaspoons (16g) kosher salt (or half as much table salt by volume)
4 tablespoons (56g) unsalted butter, melted and cooled, plus more soft butter for greasing pans
Mixer Method: In the bowl of a mixer fitted with the dough hook, combine the hot water with the milk. Assuming the milk is coming straight from your refrigerator, this will bring both to room temperature.
Add the remaining ingredients and mix on low (speed 2 of a KitchenAid) for 1 minute, or until all ingredients are moistened. Allow the dough to rest for 10 minutes. Increase speed to medium (speed 4) and knead for 7 minutes, just until a soft dough slaps around your bowl. This dough will be sticky but will firm up as it proofs. A little extra moisture is needed up front to soften the nutritious bits of bran and germ still present in the flour.
Hand-mixing Method: If you prefer to hand-mix your dough, combine hot water with milk in a medium mixing bowl. Assuming the milk is coming straight from your refrigerator, this will bring both to room temperature. Add the remaining ingredients and mix by hand until all the flour is moistened and a shaggy dough forms. Allow to rest for 10 minutes.
Turn the dough out onto a well-floured counter top and knead by hand for 8 minutes, adding up to ½ cup more of flour as needed while you work. This dough may be stickier than you are used to, but it will firm up as it proofs.
Proofing, Rolling, & Baking: Whether prepared with a mixer or by hand, transfer the dough to a greased bowl and cover with plastic wrap. Allow to rest until doubled in size, 1 to 1½ hours. Meanwhile, near the end of this bulk fermentation time, preheat the oven to 350° and grease a 13x9x2-inch baking pan, a quarter sheet pan, or two round cake pans with ample softened butter.
To shape the rolls, turn the dough out onto a floured surface and flatten slightly. Divide into 24 small portions, just shy of 2 ounces each. Roll each into a tight ball by cupping your hand around the dough and moving it in a circular motion against the counter, pushing one direction with your rounded hand and returning the dough with your rounded thumb. (Here is one of countless videos online for shaping rolls.) Place the balls evenly in the prepared pans, about 1 inch apart.
Cover with a damp kitchen towel or a piece of greased plastic wrap and leave in a warm spot in your kitchen. (Placing it next to your oven as it preheats is a great spot.) After about 30 minutes, check the final proofing stage: Press into a roll with your finger. If the indention remains, the rolls are ready to back. They it bounces back, the rolls need more time. Check again in 10 minutes.
Once ready, place in the oven and bake for 18 minutes, turning once at 10 minutes so the rolls bake evenly. For a boost of flavor, brush the warm rolls with softened butter when they come out of the oven. Allow to cool for at least 20 minutes on a cooling rack before enjoying.
The rolls will keep well for several days in a sealed zip-top bag, stored at room temperature.